

Light & Airy Sweater
- darlingdanadesigns
- Sep 2, 2019
- 5 min read
Updated: Mar 4, 2021


I've been modifying a pattern that I created sometime ago on a whim. I learned my lesson the hard way when I didn't write down my stitch counts or notes... My original intention with this one was to make the pattern exactly like my last blouse but somewhere along the way I thought of some fun modifications and ways to make it "better."
I think this Light & Airy sweater is perfect for the cooler fall weather that's on the horizon. It's a little boho and a little feminine and just the right amount of cozy.
Happy Crocheting!
~Dana
Pattern:
Materials:
⦁ Size 4.5 mm hook
⦁ Weight 3 Yarn (I used Loops &
Threads Joy DK in Cloud- it took 3.5 balls)
⦁ Yarn Needle
Sizes:
S (M, L, XG)
Note: Pattern is written for smallest size with
changes for larger sizes noted in parentheses.
In parts of the pattern it will note which parts
are applicable for certain sizes.
Bottom Part of Shirt: (Make 2)
Ch 75 (87, 99, 111)
R1: DC in the 4th Ch from the hook and in each st across [72 (84, 96, 108 dc)]
R2: CH 4 (counts as first dc and ch 1), skip ch, dc, skip next st, ch 1, dc in next, ch 1, dc in next *dc in next 6 st, (skip 1 st, ch 1, dc in next) 3 times; rep from * to last 6 stitches, dc in each st to end. Turn.
R3: Ch 3, (counts as first dc) skip first st, *dc in next 6 st, (skip 1 st, ch 1, dc in next) 3 times, rep from * to end. Turn.
R4: Ch 4, skip 1st 2 st, dc, (skip ch sp, ch 1, dc) rep 2 times, *dc in next 6 st, (skip 1 st, ch 1, dc in next) 3 times; rep from * to last 6 stitches, dc in each st to end. Turn
R5: Ch 4, skip 1st 2 st, dc, (skip ch sp, ch 1, dc) rep 2 times, *dc in next 6 st, (skip 1 st, ch 1, dc in next) 3 times; rep from * to last 6 stitches, dc in each st to end. Turn
R6: Ch 3, (counts as first dc) skip 1st st, *dc in next 6 st, (skip 1 st, ch 1, dc in next) 3 times, rep from * to end. Turn
R7: Ch 4, skip 1st 2 st, dc, (skip ch sp, ch 1, dc) rep 2 times, * dc in next 6 st, (skip 1 st, ch 1, dc in next) 3 times; rep from * to last 6 stitches, dc in each st to end. Turn
R8-31: Rep R2-R7 3 times (Rep 4 times for large/extra large)
Finish Off.
Top Half (make 2)
CH 183 (Small/Medium) / Ch 207 (large/extra large)
R1: DC in 4th ch from hook (counts as 2 dc), *dc in next 5 st, (skip 1 st, ch 1, dc in next) 3 times, dc in next st, rep from * to end. Turn
R2: Ch 4 (counts as first dc and ch 1), skip ch, dc, skip next st, ch 1, dc in next, ch 1, dc in next *dc in next 6 st, (skip 1 st, ch 1, dc in next) 3 times; rep from * to last 6 stitches, dc in each stitch to end. Turn.
R3: ch 3 (counts as first dc) skip first st, *dc in next 6 st, (skip 1 st, ch 1, dc in next) 3 times, rep from * to end. Turn.
R4: Ch 3 (counts as first dc) skip first st, *(dc in next sp, dc in next dc) 3 times, (ch 1, sk sp, dc) 3 times; rep from * to end. Turn.
R5: Ch 4 (counts as first dc and ch 1), skip ch, dc, skip next st, ch 1, dc in next, ch 1, dc in next *dc in next 6 st, (skip 1 st, ch 1, dc in next) 3 times; rep from * to last 6, dc in each st to end, Turn.
R6: Ch 3 (counts as first dc) skip first st, *dc in next 6 st, (ch 1, skip st, dc) 3 times; rep from * to end. Turn.
R7: Ch 3 (counts as first dc) skip first st, *(dc in next sp, dc in next dc) 3 times, (ch 1, skip sp, dc) 3 times rep from * to end. Turn.
R8-21: Rep R2-R7
Large/Extra Large Only:
R22- R28: Rep R2-R7
Finish Off
Assembly
1. Bottom and Top Half
⦁ Line up the Top halves with the bottom halves- should have 9 (8, 9 ,8) squares on each side (sleeve) of blouse.
⦁ Ensure that the squares are alternating (if needed flip one of the pieces)
⦁ You want the connecting pieces to continue the pattern of every other.
⦁ Sew together top piece to bottom piece on the front and the back. (I always go back twice to ensure I have a solid seam) {Shown by green line in image below}
2. Sides / Under Sleeves
⦁ Before starting to sew together the front and back pieces ensure:
⦁ The seam side of your top and bottom halves are both facing out (not on the inside of the shirt) If they are not, you will have seam side showing on both sides once you have it all sewn together.
⦁ Sew along sides {blue lines below}
⦁ Sew along bottom of sleeves {pink sides below}
**The pattern will continue along the side seams and on top and bottom of the sleeves.
3. Top
⦁ When sewing the top seam of the shirt- sew from sleeve end to center- leaving 6 (Small/Medium)/ 8 (large/extra large) squares in between the other side for the neck hole. Count inwards from sleeve to ensure even. {White lines below}


Sleeve Hem:
Once all sides are sewn together, add the trim to the end of the sleeves.
Attach yarn at a seam. Working along the outside of the original rows.
R1: Ch 2, 2 dc in each row of the sleeve. Slip Stich to starting chain once one row of DC is complete.
Finish Off.
*Do this for both sleeves

Back Lacing:
⦁ Cut 9 strands of yarn- approx. 4’ in length
(5’ for large/extra large)
⦁ Knotting the 9 strands on one end, braid
about 2.5-3’ (3.5 - 4’ large/extra large) of yarn.
⦁ Tie off end.
(I waited until I laced the back up to tie off extra yarn)
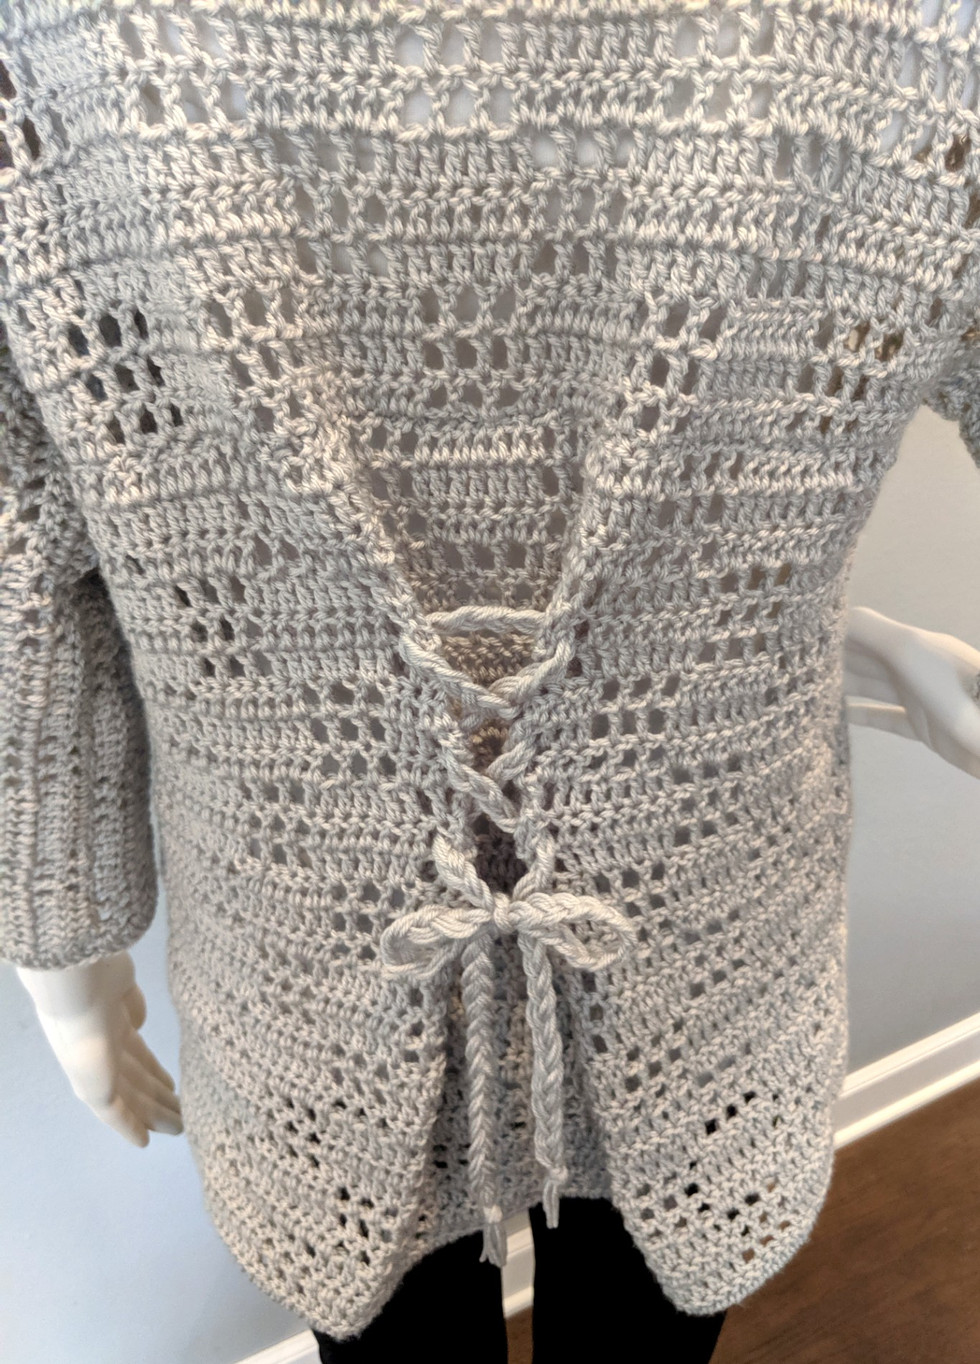
Back Lacing Assembly:
⦁ In the back count up from the bottom, 27
(33 large/extra large) rows (from bottom)
and in 4 (5, 6, 7) squares from side seam.
⦁ In the middle of each “square” (based on pattern
it should be the 9 space square)- thread one
side of your braided ribbon on each side.
Criss cross down 3 more “squares” and tie
into a bow at the end.
Trim as necessary to be at desired length.
You can put it further in or further out for more or less “cinching”.


Comments